Each Bible translation has it’s place. Some are more literal, making them better for study. Some more flowing, making them better for reading. We chose a more literal translation–the ESV (which is based on the RSV)–because our focus is on STUDYING. What follows is an article describing the differences.
How Do I Pick Out A Bible, Pastor Tom Brahears–June 29, 2011
If you’re like me and were raised with the King James Version you’d say “Now, that’s the Bible!” It’s what I’m used to. But that’s not the reason so select it. We need to take a balanced approach to this, understanding the nature of Biblical translations. All translations have certain characteristics that make them unique. Bible translations can be review in two primary ways:
1. What underlying Greek text does the translation use? Is it the “Majority” or “Received” text (a group of late Greek text that primarily comes from the Byzantine area) or the Eclectic/Critical text (mixture of different types of manuscripts, primarily using the earliest text). The KJV, NKJV, and many older translations used the former, while the newer and more up-to-date Bible’s such as the NAS, NIV, ESV, NLT, NET, etc. use the latter. It’s best to use the latter since most scholars believe that they represent the better manuscripts.
2. Each Bible has a different purpose but all are useful. Was it written for study or reading? Was it written for the seminary or the church? If you can, you should have a variety of translations for different purposes. I use the NASB for study but the NIV for classes I teach. I think it’s important for you to understand the differences. Here [also shown on the chart] are the three translation methods:
Formal Equivalence: These try to translate word for word (although this is quite difficult). Examples: NAS, KJV, ASV, ESV. Less readable, but better for study in contemporary languages. Why? Because they will usually attempt to make fewer interpretive decisions on any text that can be understood in many ways. This allows the reader to struggle through the options.
Dynamic Equivalence: Translations that seek to translate thought for thought. Examples: NIV, TNIV, NRSV, etc. Not quite as good for deep study, but usually better for reading and memorization. Dynamic equivalence translations make good pulpit or teaching Bibles.
Paraphrase: Translations that seek to use common language and idioms to get the basic point across in a very readable way. Examples: Message, Philip’s Translation, NLT, GNB, etc. While paraphrases are not good for study or memorization, they are very readable and cause you to read the text differently than you normally would. In this respect, they have great value.
>>For a more a more specific description of each transaltion and another chart,Click Here.
Manuscript study started under the late Paul Byer in 1953. Paul was an InterVarsity Christian Fellowship staff seeking to help students dig into Scripture. For more details on its history, Click Here.
Now fast forward to… 1986 and pardon the BIG HAIR / BIG GLASSES. Here Paul both explains manuscript study and leads a group through it.
A person doesn’t have to have a breadth of Bible knowledge to join in because manuscript study puts EVERYONE ON THE SAME LEVEL, with the same passage in front of them and no need to “jump all around the Bible.” Even a person with no biblical background can feel right at home and not intimidated as a participant.
Okay, so here’s another video with a little different take on manuscript study–actually a lot different. We’ll call it a CONTRAST to Paul Byer’s substance, but hey, it’s only 2 1/2 minutes long and kind of fun.
Manuscript study is all about SUBSTANCE but it’s also about STYLE as well–a FUN, EASY-TO-LEARN and INVITING approach to learning more about who God is and who we are in relationship to him… together!
In its own way the video covers the three steps of inductive Bible study:
“Who, what, where and how….” — Observation
“Why’s that there? What’s the author trying to say?” — Interpretation
“Head, heart, hands and feet….” — Application
MANUSCRIPT STUDY HANDBOOK
Lindsay Olesberg writes a 253 page, one-of-a-kind book on how to get the most out of the Bible. What’s unique about Lindsay’s work is how she highlights the manuscript study method. Well written with a lot of hands-on exercises, this is an excellent reference for those desiring to go deeper in their study of Scripture. To order the book, Click Here.
HOW TO LEAD, MANUSCRIPT STYLE
Ever thought of leading a manuscript study? If you haven’t, we hope you will. Leading a manuscript group study differs slightly from leading a regular Bible study because group members get the opportunity to study right before they discuss. So, you can ask general observation questions–Who, Where, When, What and How–and expect the group to facilitate more of the discovery process. Here’s the basic steps.
–READ the section together out loud. Such reading gives the group a sense of initial togetherness.
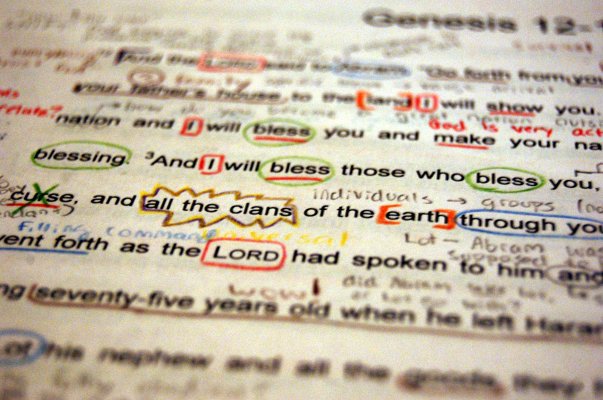
–STUDY individually for 15-30 minutes—as long as group members are engaged—with colored pens/pencils.
–DISCUSS your observations together which can be done one-to-one or within the small group.
Ask the W questions: Who’s involved & where? What’s going on & when? How’s it happening?
–DRAW OUT key interpretative questions/conclusions (the whys) within a small group discussion. Good observations will naturally lead your group to solid interpretations.
–WRAP-UP with the leader summarizing key points which leads to personal application.
–APPLY your insights through further one-to-one or small group sharing, prayer and action.
Group members can read and study their manuscript ahead of time if they’d like but this is not required. Group meetings are typically 1 1/2 to 2 hours long and include time for personal study. Group size can range from just a few to dozens as long as the group breaks up into smaller groups for discussion and prayer.